
Let’s start with a confession: for years, I was one of those people. The ones who’d politely push Brussels sprouts around their plate, convinced they were the bitter enemy of every festive feast. But then, something shifted. I decided to try growing them myself, right in my own garden. And let me tell you, the transformation was nothing short of magical.
Those homegrown Brussels sprouts? They were sweeter, bursting with flavour, and suddenly, this once-dreaded vegetable became a true Christmas delight for my family.
Why Brussels Sprouts?
If you’ve ever dreamed of harvesting your own fresh, nutritious vegetables, or if you’re simply curious about unlocking the true potential of this quirky-looking plant, you’re in the right place. My experience taught me that the supermarket variety often doesn’t do these little green globes justice.
The real sweetness and depth of flavour come from growing them yourself, especially after a touch of frost. It’s a rewarding journey that connects you directly to your food, and trust me, the taste difference is astounding.
What You’ll Learn?
In this guide, I’ll share my journey and all the tips and tricks I’ve learned to help you cultivate your own delicious, frost-sweetened Brussels sprouts. We’ll cover everything from choosing the best varieties and preparing your soil, to nurturing your plants through their long season, and finally, enjoying those tasty harvests.
Getting Started: Picking the Perfect Spot and Variety
Choosing the right location is key to a successful Brussels sprouts harvest. These plants are sun-worshippers!
Where’s the Best Place to Plant?
Brussels sprouts thrive in full sun, meaning they need at least six hours of direct sunlight daily. In a hotter climate, you might consider planting in partial shade during the intense summer heat to prevent stress. My own vegetable garden gets plenty of morning sun, which seems to make all the difference.
What Kind of Soil Do Brussels Sprouts Love?
They absolutely adore fertile, well-drained, firm soil. If your soil is acidic, you’ll want to add lime to bring the pH closer to neutral (6.5-7.0). I always work in plenty of manure and compost in the autumn. For a no-dig approach, a thick layer of mulch or other organic matter works wonders to settle the soil and enrich it over the long season. This also helps conserve moisture and control weeds.
Choosing Your Brussels Sprouts Variety
There are so many fantastic varieties available now, many of which are specifically bred for sweetness and resistance to common problems. Look for F1 hybrid options, as they often offer improved yield and vigour.
- ‘Crispus’: This RHS Award of Garden Merit (AGM) winner is a top choice, known for its excellent standing ability and firm, dense sprouts.
- ‘Cascade’: Another AGM winner, ‘Cascade’ produces high-quality, firm sprouts and shows good resistance to powdery mildew.
- ‘Red Bull’: If you’re looking for a splash of colour, this purple variety offers a lovely nutty flavour and a beautiful hue.
- ‘Falstaff’: Another purple option, known for its mild taste.
Experts recommend trying different early-season, mid-season, and late-season varieties to extend your harvesting period well into winter, providing fresh vegetables for months. Don’t forget about hybrid kalettes and flower sprouts—these are crosses between Brussels sprouts and kale, offering a unique, mild, and nutty flavour!

Sowing the Seeds: From Indoors to Outdoors
Getting your Brussels sprouts started is a rewarding experience. I usually begin my seeds indoors to give them a head start.
Starting Seeds Indoors: My Secret to Success
I sow my seeds in a modular seed tray filled with peat-free seed compost around March or April. This gives the root system a great start without too much disturbance.
- Timing: Sow indoors about 6-8 weeks before your region’s last frost date.
- Light: Place your seedlings in bright light—a greenhouse, coldframe, or even a sunny windowsill works. If you have them, grow lights are fantastic for strong, stocky plants.
- Watering: Keep the seed compost consistently moist, but not waterlogged.
Once they have a few true leaves, it’s time for thinning the seedlings to one per module. This ensures each plant has enough space and nutrients to develop a strong root system.
Transplanting Outdoors: Preparing for Growth
When your young plants are about 4-6 inches tall and the danger of hard frost has passed, they’re ready for transplanting outdoors into their prepared ground. This usually happens from late May to early July, depending on your zone and local average frost date.
- Hardening Off: Before planting out, gradually acclimatize your seedlings to outdoor conditions over a week or two. This “hardening off” process reduces transplant shock.
- Spacing: Brussels sprouts need room! Plant them in rows, leaving about 24-30 inches between each plant and 30-36 inches between rows. Proper spacing ensures good airflow, which helps prevent fungal diseases.
- Depth: Plant them slightly deeper than they were in their containers, up to the first set of leaves.
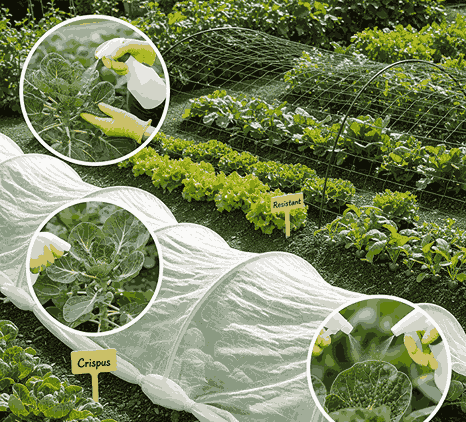
- Protection: Immediately after transplanting, consider covering your young plants with fleece or row covers to protect them from early pests like cabbage worms, slugs, and snails.
If you’re short on garden space, don’t despair! You can grow Brussels sprouts in large containers. Choose pots at least 18-24 diameter and fill them with multi-purpose compost.
Care and Cultivation: Nurturing Your Brussels Sprouts
Brussels sprouts are hardy and robust plants, but they do require consistent care throughout their long season to produce those fantastic harvests.
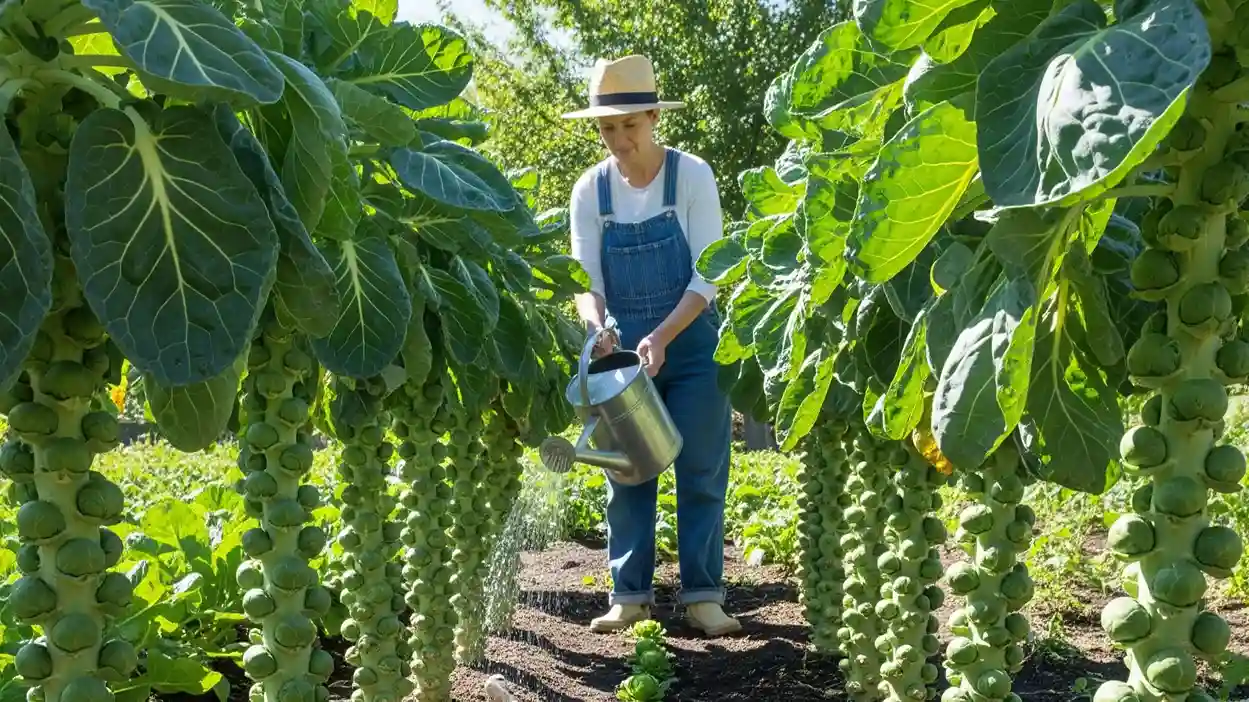
Watering: The Key to Juicy Sprouts
Consistent moisture is crucial, especially during dry spells. I use drip irrigation or water thoroughly at the base of the plants. Avoid overhead watering in the evenings to reduce the risk of powdery mildew and other fungal issues. A thick mulch layer around the plants also helps conserve moisture and control weeds.
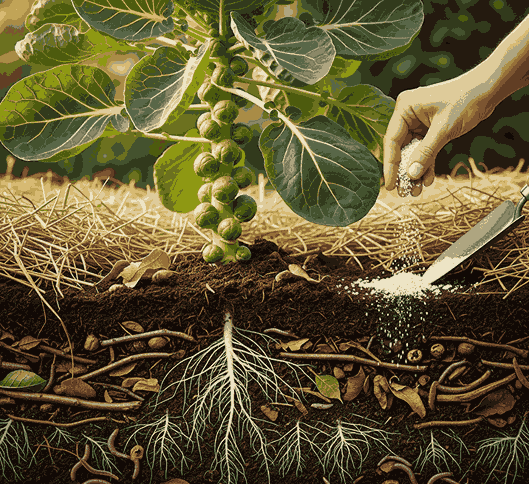
Feeding: Fueling Growth
These are heavy feeders, meaning they need lots of nutrients for a bountiful harvest.
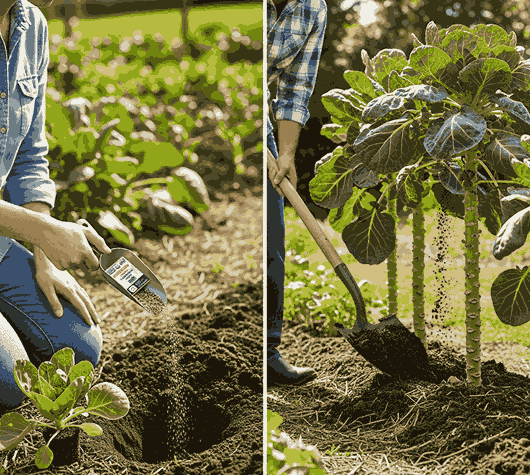
- Initial Boost: When planting, I add a balanced organic garden fertilizer to each planting hole.
- Side Dressing: Around June or July, once the plants start to develop their sturdy stem and leafy growth, I side-dress with more compost or a high-nitrogen fertilizer to encourage strong leaf growth and sprout development.
Pest and Disease Patrol: Protecting Your Crop
Even the most well-tended veg plots can encounter issues. Here’s how I keep my brassicas healthy:
- Cabbage Worms & Looper Larvae: These are common culprits. I use row covers early on. For infestations, Bt (Bacillus thuringiensis) is a natural bacterium that targets these larvae without harming beneficial insects.
- Aphids: A strong spray of water can dislodge them, or use insecticidal soap or neem oil.
- Club Root: This nasty soil-borne problem can devastate brassica crops. Crop rotations are essential to prevent its buildup. Look for club root resistance varieties like ‘Crispus’.
- Pigeons: These birds love to peck at the leaves. Netting can be a lifesaver!
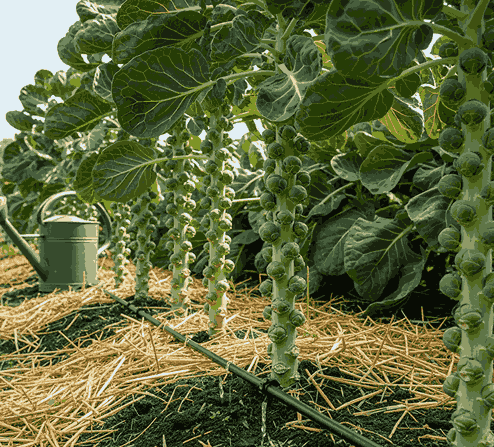
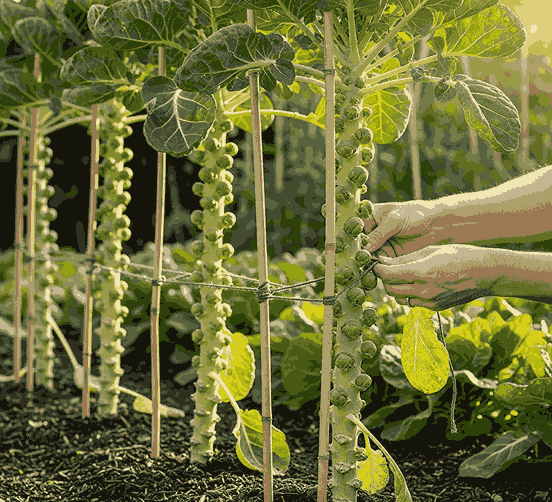
Staking: Supporting Tall Plants
As your plants grow tall, especially in windy gardens, they can become top-heavy. I usually stake them with a bamboo cane to prevent them from loosening in the soil or snapping. This ensures the plant’s energy goes into plumping up those sprouts, not repairing its root system.
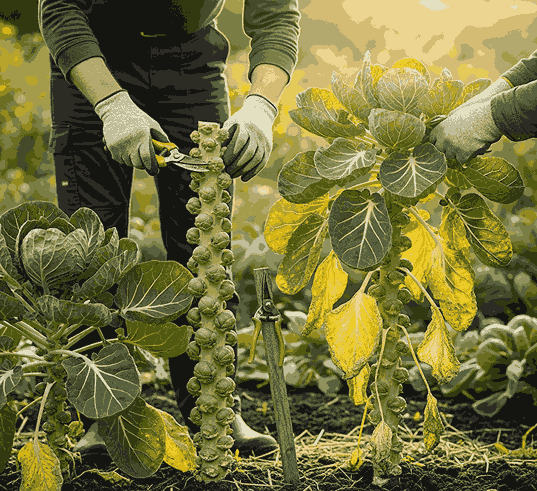
Pruning for Bigger Sprouts: My Secret Technique
One of my favorite tips for encouraging bigger, beautiful sprouts is a technique called “stopping” or “topping.” Around September, when the lower sprouts are developing, I chop off the very top of the main stem. This redirects the plant’s energy into the developing sprouts, helping them to mature and firm up. I also prune leaves that are yellowing or blocking sunlight from the lower sprouts, ensuring good circulation and light penetration.
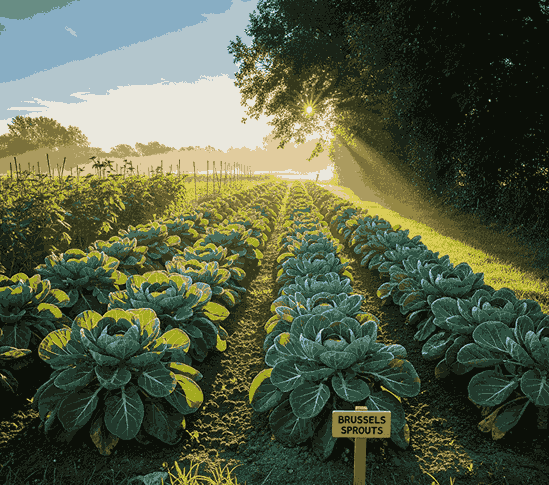
Harvesting Your Delicious Brussels Sprouts
This is the moment we’ve been waiting for! Harvesting Brussels sprouts is truly satisfying, especially when you know you’ve grown them yourself.
When to Harvest: Timing is Everything
Brussels sprouts are a cool-season crop and are truly hardy. They often taste the sweetest after a few frosty nights, as the cold weather converts starches into sugars, acting as a natural anti-freeze and enhancing their flavour.
- October onwards is usually when the magic begins for mid-season and late-season varieties.
- Harvest when the sprouts at the bottom of the stalk are about 1-1.5 diameter, dense, and firm.
How to Harvest: A Gentle Touch
I always start harvesting from the bottom of the plant and work my way up.
- Use a sharp knife or pruners to cut them off the stem.
- You can also give them a sharp downward tug to snap them off.
- Continue harvesting as needed, and your plants will continue to produce for months, even into the coldest winter weather.
Don’t forget the sprouts tops and spring greens! Once you’ve finished harvesting the sprouts, you can often cut the top leafy part of the plant for a bonus crop.
Storage: Keeping Them Fresh
Freshly harvested Brussels sprouts are best eaten right away, but they will store well.
- Refrigerator: Store them in a plastic bag in the refrigerator for up to a week.
- Freezing: For longer storage, you can blanch and freeze them.
Common Brussels Sprout Problems
Even with the best care, you might encounter a few challenges during the growing season. Don’t worry, it’s all part of the gardening experience!
- Yellowing Leaves: Often a sign of nutrient deficiency (especially nitrogen) or simply the natural process of older leaves dying off. Prune these off to redirect energy.
- Sprouts Not Forming: Ensure adequate sunlight, consistent watering, and proper feeding. Sometimes, environmental stress can inhibit sprout development.
- Loose Sprouts: This can be due to insufficient firming of the soil or inconsistent watering. Treading around the base of the plant in autumn can help firm the soil.
Final Thoughts
These delightful vegetables have undergone a real revival in popularity! No longer just a side dish for the Christmas feast, they’re versatile and delicious in so many dishes. From steamed to sautéed or stir-fried, their mild, nutty, sweet flavour and health-boosting nutrients (like calcium, iron, magnesium, phosphorus, potassium, and various vitamins) make them a fantastic addition to any meal, especially during the leaner months.
I hope this guide encourages you to give growing your own Brussels sprouts a try. There’s nothing quite like the flavour of homegrown produce, and the satisfaction of a successful harvest is truly immense. Happy gardening!
FAQs
Q: Why are my homegrown Brussels sprouts bitter?
A: Many modern varieties have been bred to be much sweeter. If yours are bitter-tasting, it might be an older variety or they might not have experienced enough frost to develop their full sweetness. Also, inconsistent watering or nutrient deficiencies can sometimes affect flavor.
Q: Can I grow Brussels sprouts in containers?
A: Absolutely! Compact varieties work best. Choose large containers at least 18-24 diameter and ensure they have good drainage. Use a multi-purpose compost and keep the soil consistently moist.
Q: What is the best spacing for Brussels sprouts?
A: For optimal growth and airflow, aim for about 24-30 inches between individual plants and 30-36 inches between rows. This helps prevent fungal diseases and allows each plant to get enough sunlight.
Q: When is the best time to plant Brussels sprouts seedlings?
A: You should transplant your seedlings outdoors in spring or early summer, typically from late May to early July, once the danger of hard frost has passed and the ground is prepared.
Q: Do Brussels sprouts need full sun?
A: Yes, they prefer full sun, meaning at least 6 hours of direct sunlight daily, for robust growth and sprout development. In very hot climates, a little partial shade during the hottest part of the day can be beneficial.
Q: How do I protect my Brussels sprouts from pests?
A: Row covers are excellent for deterring cabbage worms, cabbage loopers, flea beetles, and pigeons. For aphids, insecticidal soap or a strong spray of water can help. Always monitor your plants regularly.
Q: Can I harvest sprouts after the first frost?
A: Yes! In fact, many gardeners find that the sweetest and most flavourful Brussels sprouts are harvested after the first frost. The cold weather helps to enhance their natural sugars.
Q: What are “kalettes” or “flower sprouts”?
A: These are exciting new hybrid vegetables, crosses between Brussels sprouts and kale. They offer a unique, mild, and nutty flavour with beautiful leafy florets. It’s a fun variety to try!
Sources:
- Royal Horticultural Society (RHS): https://www.rhs.org.uk/
- University of Minnesota Extension: https://extension.umn.edu/
- Old Farmer’s Almanac: https://www.almanac.com/
- Gardener’s World: https://www.gardenersworld.com/
- National Gardening Association: https://garden.org/

Hello! I’m Ibrahim, the owner and writer of this blog. I run a chicken farm with 160 chickens, and I’ve gained a lot of knowledge about raising and caring for them. Now, I want to share my insights and experiences with you to help you in chicken keeping.